Tired of text ads? Want to put a little more sparkle into your marketing? When it comes to branding your business online, banner ads have a lot of advantages over search marketing. However, good creative is a key ingredient in a successful display ad campaign.
Google offers a tool as part of the AdWords platform called the Ad Builder. Here is a look at the good, the bad, and the ugly of using the Ad Builder to make a simple banner ad.
How to Build an Ad
As long as you want to just use a template to create an ad, the Ad Builder is pretty simple to use. For those that have a strong idea of what you want the ad to look like, it is possible to start with a blank slate.
Personally, I am not a strong visual person, so I find it beneficial to start with a template as a guide. There are a lot of templates to choose from, although many of these are very cheesy. For demonstration purposes, the following steps are for customizing based on a very simple template.
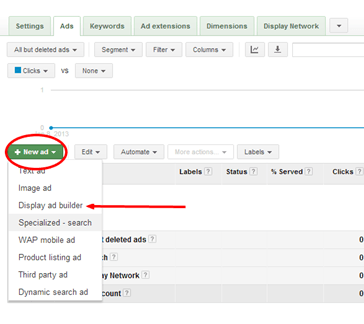
Step 1: Launch the Display Ad Builder
After you set up a campaign, go into the Ads tab. Under the ?New Ad? option, select ?Display ad builder? from the drop down menu.
Step 2: Choose a Template
Look through the menus for a template style that matches what you want.
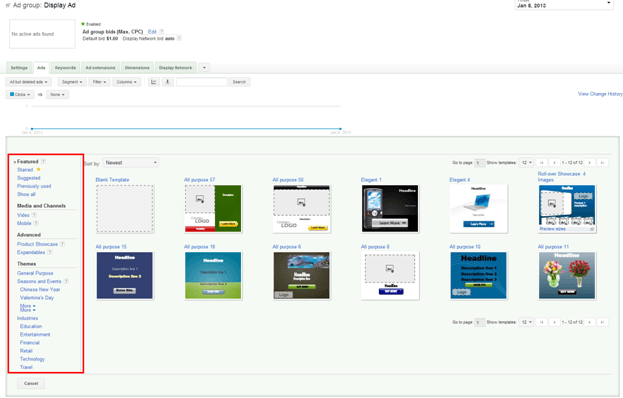
Different templates offer different amounts of customization, so spend a little time opening up different ones and looking at what options can be changed, or whether the drop down menu for new content is showing at the top of the editing window.

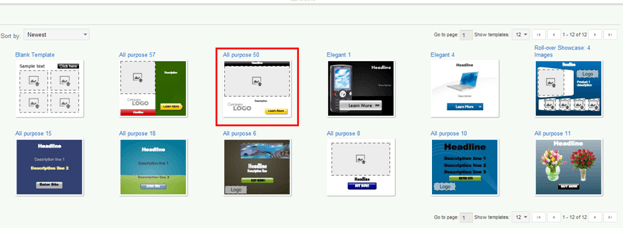
In this case, I am going to use the ?All Purpose 50? template.
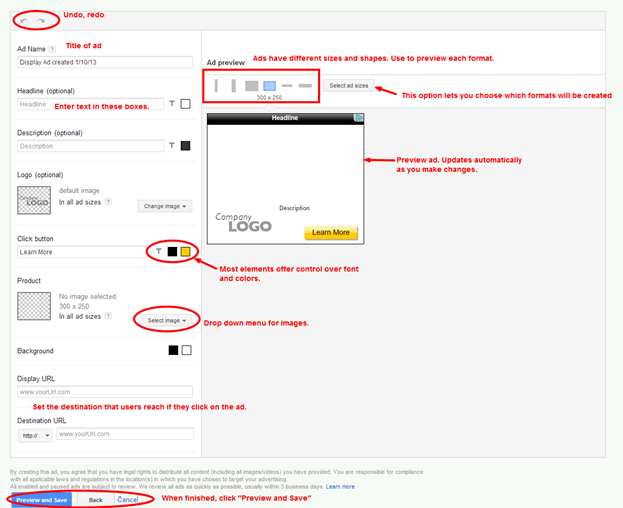
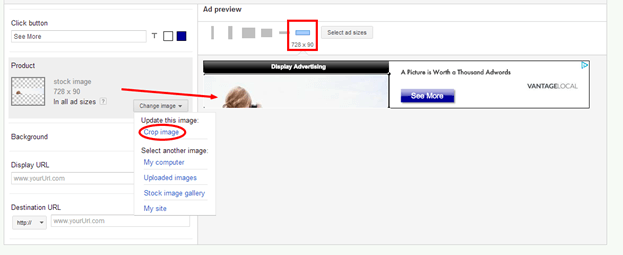
Here is a look at the different parts of the main Ad Builder interface:
Step 3: Add Text
Display ads have the advantage of incorporating both text and images. Keeping with the theme of this article, I use a headline of ?Display Advertising.? Then, in the description box, I type in a catchy slogan to go along with my ad.
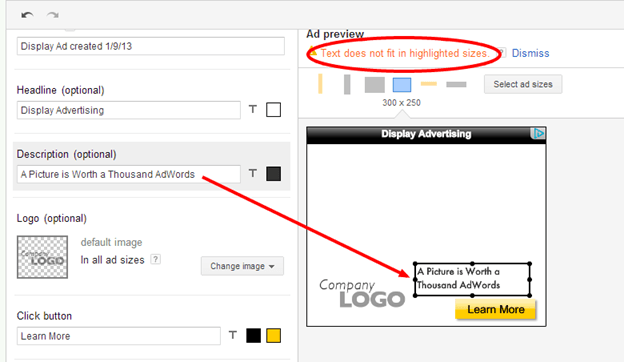
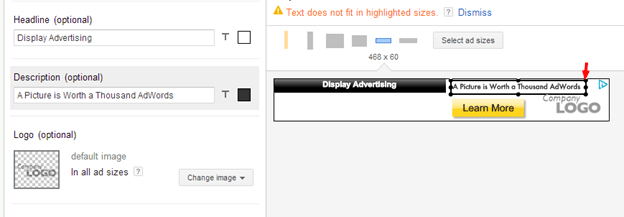
This does not fit well in all ad formats. I switch between the views and tweak the size and shape of the box on each one so that the text fits okay.
Before:
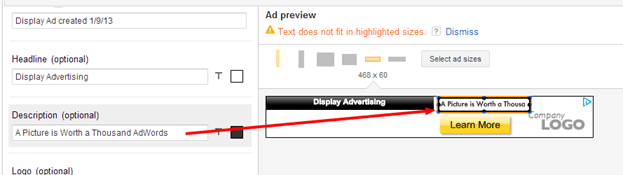
After:
Note that the Ad Builder will resize the font to fit the box.
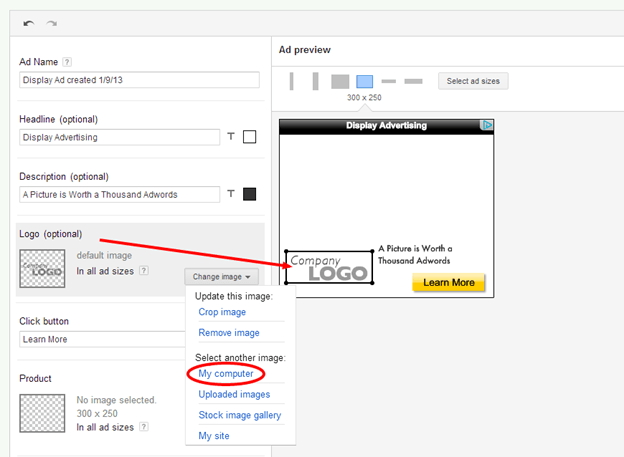
Step 4: Add Graphics
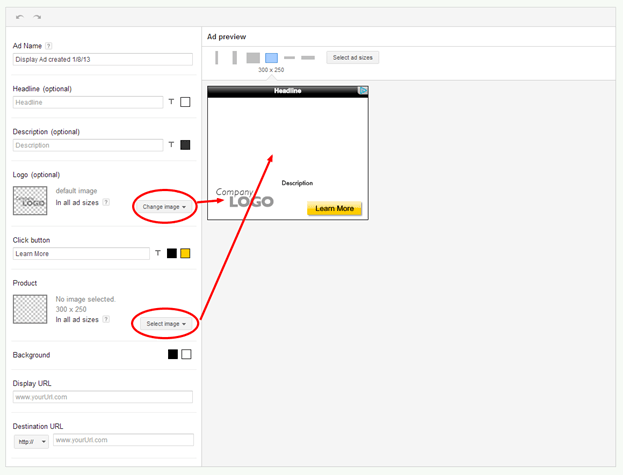
For the logo, I am going to use our own company graphics. So I choose ?My computer? under ?Select another image.?
My logo file is a square, but the space provided is a rectangle. This causes it to look funny:
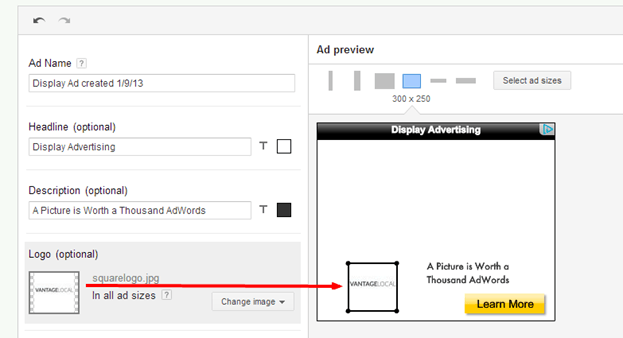
Not to worry, I can crop it to make it fit.
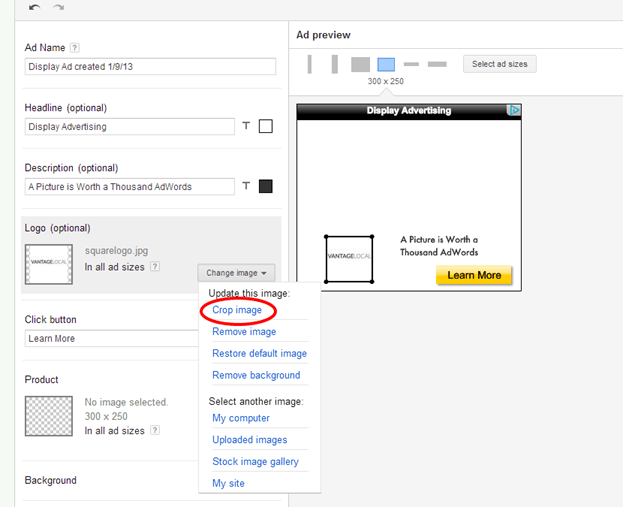
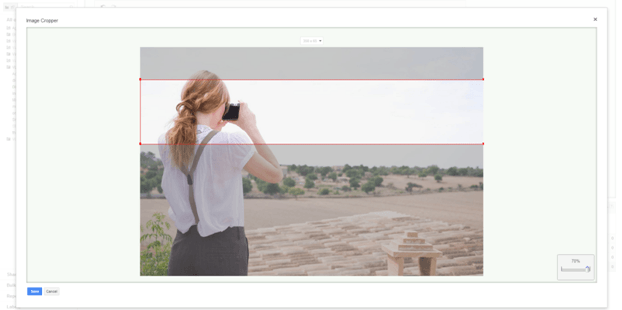
This is the canvas for cropping images. Grab the corners to change the crop dimensions.
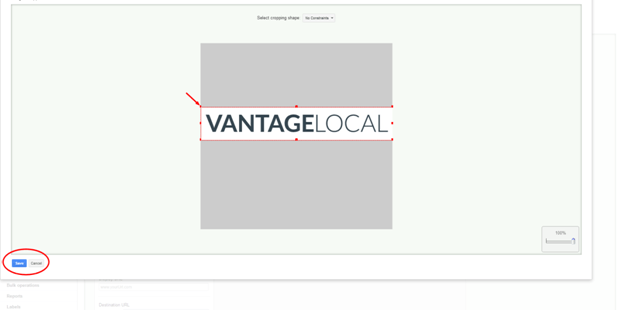
Resize and move around the placement on the main preview screen.
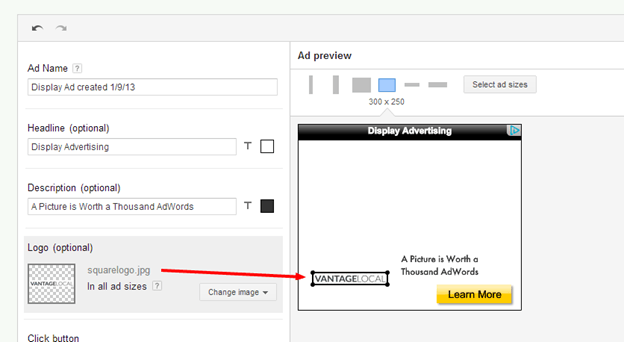
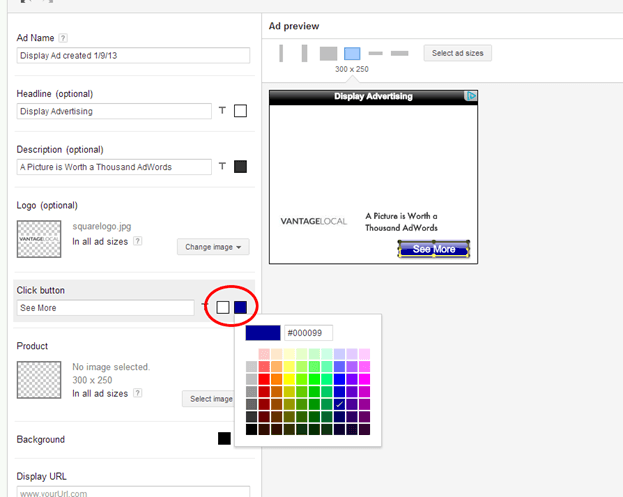
While I?m at it, I update the call to action button.? This was somewhat frustrating.? Some templates limit your ability to tweak positioning of items like the button. Also, there is no way to measure positioning of objects, so you have to be careful with spacing and centering. It would be nice to have a snap-to-grid type of feature.
For the main image, I decide to use an image from the stock photo gallery.
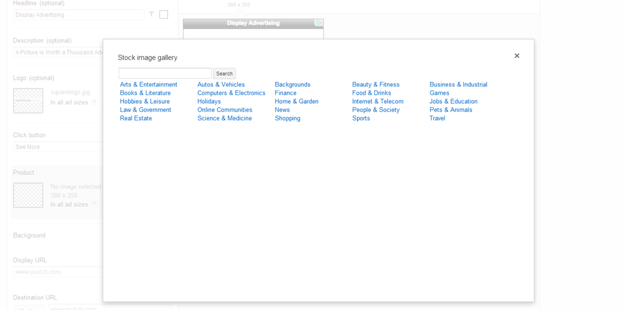
I do a keyword search on ?picture? and come up with this one.

The Ad Builder will show a slice of the image based on the ad format. Sometimes it comes out just fine, like this one:
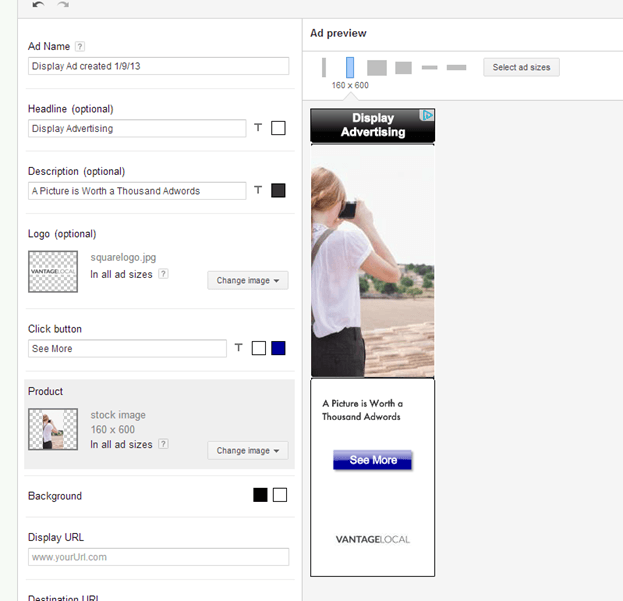
But sometimes you have to nudge it to show a good slice.
Once again, the drag-and-drop interface gives some control over the crop. For some reason, I was not able to change the zoom level from this screen, even though there is a toggle in the lower right hand corner.
Be sure to check how the ad looks in each of the formats. Remember, you don?t have to use every single format. But, the more formats you use, the more websites you will be able to place the ad on.
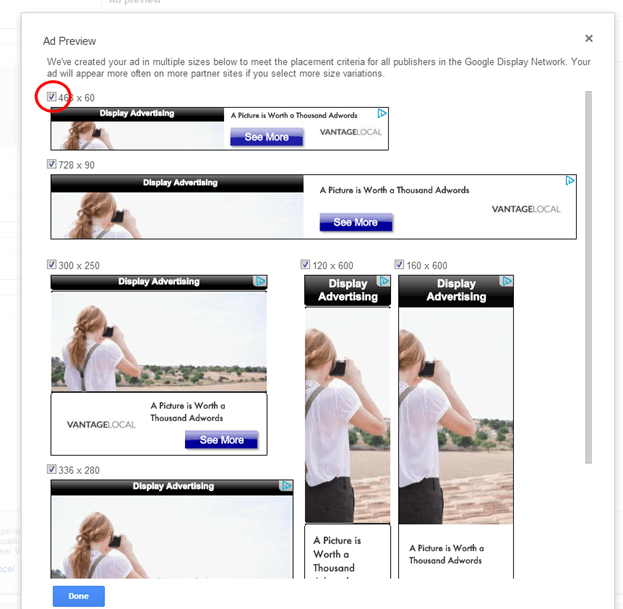
You can do adjustments on the ?select ad sizes? page, allowing you to view all the formats in one place simultaneously. After making the big choices, I go through and tweak each size ad to get the best positioning of the elements. Here are the finished versions:

Check and double check for errors. See my mistake above with capitalization of ?AdWords?? Note that by default Google includes a little section at the lower left hand corner of the ad for a Google +1 button.
In their support documentation, they note that it is important not to design an ad that has important features (like your logo) in the bottom 20 percent of the space. More specifically, the button is 15-24 pixels in height. What are people +1-ing when they click the button? The ad itself.
How to get rid of the +1 button: You won?t see the +1 button until after you save the ads. To remove them, you have to be in the main AdWords dashboard. For the Google Display Network, here are the steps they provide:
- Sign in to your AdWords account at?https://adwords.google.com.
- Click the?Campaigns?tab, then click the campaign you want to edit.
- Click the?Settings?tab.
- Click?Advanced settings > Social Settings?to change your ad sharing preferences.
If the ads are running within the Google Search Network you are not able to opt out of the button.
Final Step
Once you are finished, you save the ad and are taken back to the familiar campaign dashboard.
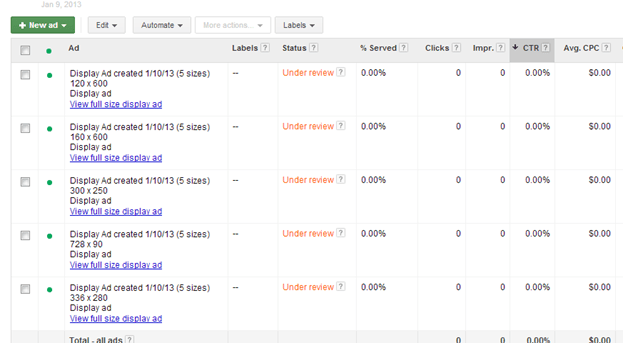
You can view the finished creative by clicking on ?View full size display ad.? This also gives you an option to share the ad preview by generating a link that you can copy and paste. The ad you created will have a status of ?Under review.?
According to Google, this process normally takes up to three business days. Each format will show up as a separate ad, which makes sense since you can actually put completely different graphics and copy on each one.
Ad Builder Shortcomings
The animation controls are where the tool is most limited. On most templates, you can set how each element appears by selecting an appearance effect such as fade in, float in, fly in, zoom in, shrink in, and drop in. Controls on these are duration, delay, and direction (left, right, top, and bottom). The Ad Builder does not offer control over exit animations, so once an element plops in it stays to the end. So what this allows is the gradual buildup of a final image by adding elements over a short period of time.
There is no way to create your own slide show or other serial image presentation other than through the templates that have it built in, like the ?Product Showcase? templates. Also, there are no drawing tools, so you would have to make any extra objects that you want- like edge frames, arrows, or boxes?in another program like Photoshop and upload them as separate images.
Lastly, the animations are simplistic, which could be very frustrating to the more graphically inclined user.
Another shortcoming of the Ad Builder is that it does not offer any way to save an ad that you have created yourself and use it as a template for new ads. It is possible to take an ad that you created for one campaign and copy it over to a new campaign.
Once you do so, you can make a few tweaks to update the ad for the new objectives. Note that you now have to select all the ads before clicking the edit button if you want to make changes to the whole group
Final Thoughts
No matter what tool you use to build your banner ads, good graphics are key. Google offers stock photos, but this has a tendency to make your ad look rather generic. There is no quick replacement for having strong visual assets designed just for your brand.
The ad builder tool offers the ability to upload images from your computer, use stock photos, or it will fetch images from your website. I like this last option. If you have already put a lot of resources into making a great website, you can quickly put that to use. Ads that match the destination site are shown to be more effective.
It would be really helpful if Google provided data on how each element performs. For example, the call to action buttons?what happens if you change the size, the color, the drop shadow effect, etc.? I was not able to find information on the number of ads built using this tool, but they surely have a?sizable?amount of data that could provide insights on creative optimization.
What can you do with your ad once you have built it? You can run it on GDN (Google Display Network), of course. But you can?t exactly download the final files and Google does not give you the tags that would identify where to locate the ads on its ad server.
At my firm, we find that hyper-local campaigns have to run on many networks besides just the GDN in order to get enough exposure, so the display ad builder is not really a good solution for us. Plus, our creative team finds the animation options far too limiting. But for a small online business that wants to go beyond text ads, you can build a decent banner ad with the Google Display Ad Builder.
Leslie Van Zee is passionate about entrepreneurship and understanding what makes small businesses successful. An avid fan of lean startups, she makes sure to get out of the building as much as possible in her role as manager of marketing for local online display specialists Vantage Local.Source: http://www.searchenginejournal.com/using-the-google-display-ad-builder/58084/
philadelphia flyers 4/20 student loan forgiveness ufc 145 weigh ins record store day 2012 detroit red wings jose canseco
No comments:
Post a Comment